

A clean sink drain is essential for maintaining a fresh, hygienic, and properly functioning kitchen or bathroom. Over time, soap residue, food particles, grease, hair, and other debris can collect inside drainpipes. This buildup may cause unpleasant odors, slow drainage, and stubborn blockages. Fortunately, learning how to clean a sink drain is relatively simple when you use the right cleaning methods.
Many household drain problems can be prevented through regular maintenance and careful cleaning. You do not always need expensive products or professional plumbing services to remove ordinary buildup. Simple tools, warm water, dish soap, and mechanical cleaning methods can help restore proper drainage. Understanding what causes blockages also makes it easier to prevent similar problems from developing again.
This guide explains how to clean a sink drain step by step using practical household techniques. You will learn how to remove debris, clean drain stoppers, eliminate unpleasant smells, and maintain kitchen and bathroom drains. Whether your sink drains slowly or simply needs routine maintenance, these methods can help keep your plumbing system working efficiently.
Why Is Cleaning a Sink Drain Important?
Cleaning a sink drain regularly helps prevent the accumulation of debris that can interfere with water flow. Kitchen drains often collect food particles, oils, and grease, while bathroom drains commonly develop buildup from hair and soap residue. When these materials accumulate, drainage becomes slower and blockages may eventually form. Routine cleaning helps maintain a more reliable plumbing system.
A neglected sink drain can also develop unpleasant odors as trapped organic material begins to decompose. Moist environments inside drainpipes may support the growth of microorganisms associated with unwanted smells. Cleaning visible debris and maintaining proper water flow can reduce these conditions. A well-maintained drain also makes everyday kitchen and bathroom activities more convenient.
Regular drain maintenance may help reduce the likelihood of expensive plumbing problems over time. Small blockages are generally easier to address before they become severe. Inspecting sink components also provides opportunities to identify leaks, damaged seals, or other developing issues. Simple preventive habits can make a noticeable difference in household plumbing performance.
Step 1: Gather the Right Sink Drain Cleaning Supplies
Before cleaning your sink drain, collect the tools and materials needed for the process. Basic supplies include rubber gloves, dish soap, warm water, a small cleaning brush, and disposable paper towels. A drain cleaning tool or plastic hair-removal strip may also be useful. Preparing everything beforehand makes the process more organized and helps reduce unnecessary mess.
For more stubborn debris, you may need a sink plunger or a suitable hand-operated drain auger. A bucket can help collect water when inspecting removable plumbing components. Choose tools designed for household plumbing to avoid damaging pipes or drain fittings. If you are uncertain about removing plumbing parts, begin with simpler surface-cleaning methods.
Avoid mixing different drain-cleaning products or experimenting with strong chemical combinations. Commercial drain cleaners may contain corrosive ingredients that can damage skin, eyes, and certain plumbing materials. If a chemical cleaner has already been poured into the drain, do not follow it with plunging or mechanical cleaning because splashing may occur. Follow the product label and seek professional advice when needed.
Step 2: Remove Visible Debris From the Drain Opening
The first practical step is removing visible debris from the sink drain opening. Put on protective gloves and inspect the drain cover, strainer, or stopper. Food scraps, hair, and soap residue may accumulate around these components. Removing this material can sometimes improve drainage without requiring additional cleaning methods.
Carefully lift out removable strainers or stoppers according to the sink’s design. Use a paper towel or small cleaning brush to collect trapped debris. Place the removed material into a garbage bag rather than washing it farther down the drain. Avoid forcing tools into openings because this may damage internal fittings or push debris deeper into the plumbing.
After clearing the opening, rinse removable components with warm water and dish soap. Scrub away visible residue before reinstalling them in their correct positions. Check that the drain cover or stopper operates normally after cleaning. This simple maintenance task helps keep the drain entrance clear and reduces the amount of debris entering the pipes.
Step 3: Flush the Sink Drain With Warm Water
Warm water can help loosen ordinary soap residue and some greasy deposits inside household drains. This method is particularly useful for routine maintenance when water already flows freely. Begin by running warm tap water through the sink for a short period. Observe whether the drainage speed improves as loose material moves through the plumbing.
For kitchen sinks, a small amount of dish soap can help break up oily residue on accessible surfaces. Allow the soapy water to flow through the drain, followed by additional warm water. This approach is intended for light buildup rather than serious blockages. Hardened grease and large obstructions usually require a more direct cleaning method.
Avoid pouring boiling water into drains without knowing whether the pipes and fittings can safely tolerate extreme temperatures. Very hot water may damage certain materials or increase the risk of burns. Warm tap water is generally a safer option for routine cleaning. If the sink remains blocked, stop flushing and investigate the obstruction rather than allowing water to overflow.
Step 4: Clean the Sink Stopper and Drain Assembly
Bathroom sink stoppers often collect hair, toothpaste residue, soap deposits, and other materials. Over time, this buildup can interfere with drainage and contribute to unpleasant smells. Cleaning the stopper is an important part of bathroom sink maintenance. Many designs allow removal, although the correct procedure depends on the drain mechanism.
For a removable stopper, follow the manufacturer’s instructions or identify how the assembly is secured. Some pop-up designs have a retaining mechanism beneath the sink that should not be forced. Once the stopper is safely removed, wash it with warm soapy water. Use a soft brush to clean grooves and areas where residue collects.
Inspect the drain opening for additional visible buildup while the stopper is removed. Collect loose debris carefully without damaging internal components. Reinstall the stopper correctly and check that it opens and closes normally. If the mechanism appears damaged or difficult to remove, professional assistance may be preferable to forcing the assembly apart.
Step 5: Use a Sink Plunger for Minor Clogs
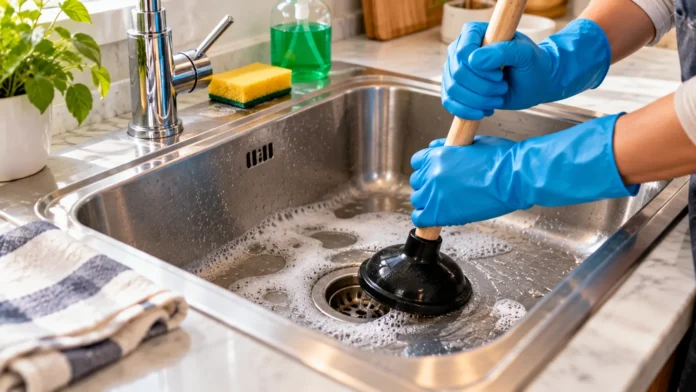
A sink plunger can sometimes remove minor blockages caused by accumulated debris. Choose a cup-style plunger designed for flat sink drain openings. Make sure the drain has enough water to cover the plunger’s rim. A suitable seal is essential for creating the pressure changes that help loosen an obstruction.
For sinks with an overflow opening, follow appropriate instructions for sealing it during plunging. Position the plunger securely over the drain and use controlled movements to work on the blockage. Avoid excessive force that could affect loose plumbing connections. If water begins flowing normally, rinse the drain with warm water to check the result.
Never plunge a sink containing chemical drain cleaner because hazardous liquid may splash onto exposed skin or eyes. Stop immediately if plumbing connections begin leaking or unusual sounds occur. A blockage that does not respond to ordinary plunging may require further inspection. Repeated aggressive attempts can create additional problems without removing the underlying obstruction.
Step 6: Remove Stubborn Debris With a Drain Cleaning Tool
A suitable drain cleaning tool can help remove hair and other physical obstructions near the drain opening. Plastic hair-removal strips are commonly used for bathroom sinks because they can catch accumulated strands. Small hand-operated drain augers may be useful for blockages located farther inside accessible pipes. Always choose equipment appropriate for the plumbing system.
Insert the tool carefully according to its instructions and avoid forcing it around resistance. Remove collected debris slowly to reduce splashing and prevent contamination of nearby surfaces. Place the material into a garbage bag and clean reusable tools afterward. Mechanical cleaning is often more effective for hair clogs than relying on household liquid mixtures.
Stop if the tool becomes stuck or the drain assembly appears unstable. Excessive pressure can damage fittings or create leaks in older plumbing systems. Complex blockages and inaccessible pipe sections may require professional equipment. Knowing when to stop is important because preventing plumbing damage is more valuable than attempting increasingly forceful cleaning methods.
Step 7: Rinse, Inspect, and Test the Drain
After removing visible debris and addressing minor blockages, rinse the drain with warm water. Allow enough water to flow through the sink to evaluate drainage performance. The water should leave the basin smoothly without significant pooling. This final check helps determine whether the cleaning process has resolved the original problem.
Inspect the area beneath the sink for signs of leaking water. Check visible pipe connections, the cabinet floor, and surrounding surfaces for unexpected moisture. If you removed any drain components, confirm that everything has been reassembled correctly. Even a small leak should be addressed promptly to prevent damage to cabinets and flooring.
Once the drain operates properly, clean the surrounding sink basin and faucet area. Remove any remaining residue and dry nearby surfaces with a suitable cloth. Wash reusable cleaning tools and dispose of contaminated materials appropriately. Completing these final steps helps restore a cleaner sink area and establishes a useful routine for future maintenance.
How to Clean a Kitchen Sink Drain Naturally
Kitchen sink drains commonly collect grease, cooking oils, food scraps, and dishwashing residue. These materials can cling to pipe surfaces and gradually restrict water flow. Routine cleaning should focus on preventing waste from entering the drain and removing accessible buildup. Simple household supplies are often enough for maintaining a kitchen sink that drains normally.
Begin by cleaning the sink strainer and removing visible food particles. Wash the drain opening with dish soap and warm water using a suitable cleaning brush. Follow with a gentle warm-water rinse when the drain is flowing freely. This approach helps remove surface residue without introducing unnecessary chemicals into the plumbing system.
Avoid relying on baking soda and vinegar as a guaranteed solution for blocked pipes. Although the mixture creates noticeable fizzing, it does not reliably remove compacted grease or solid obstructions. Physical removal is generally more effective for significant buildup. Preventing cooking oil and food waste from entering the sink remains one of the most useful long-term habits.
How to Clean a Bathroom Sink Drain
Bathroom sink drains commonly become clogged with hair, soap residue, toothpaste, and grooming products. These materials can collect around the drain stopper and form a dense obstruction. Regularly removing visible buildup helps maintain proper drainage. Bathroom sinks may require more frequent stopper cleaning than kitchen sinks because hair often becomes trapped in the drain assembly.
Start by removing accessible debris from the drain opening and cleaning the stopper when its design allows removal. Use warm soapy water and a small brush to wash the surrounding surfaces. A suitable hair-removal tool may help collect additional material just below the opening. Dispose of removed debris in the trash rather than returning it to the drain.
After cleaning, run warm water to determine whether the drainage speed has improved. Check that the stopper is correctly installed and operates without sticking. If the sink remains slow, a deeper obstruction may be present. Persistent blockages should be investigated before using stronger products or attempting complicated plumbing repairs.
How to Remove Bad Smells From a Sink Drain
Unpleasant sink drain odors often develop when food particles, soap residue, or other organic materials accumulate inside the plumbing. These materials may begin decomposing and produce noticeable smells. Cleaning the drain opening and removing trapped debris are useful first steps. However, different odors can have different causes, making proper identification important.
Wash accessible drain components using warm water and dish soap. If the sink includes a removable stopper, clean it thoroughly to remove residue. In a kitchen with a garbage disposal, follow the manufacturer’s cleaning instructions for that appliance. Never place fingers or loose tools inside a disposal chamber while it could operate.
A strong sewage-like smell may indicate a dry drain trap, ventilation problem, or plumbing defect rather than ordinary buildup. Running water into an infrequently used drain can sometimes restore the water seal in its trap. If the odor persists, professional inspection may be necessary. Repeatedly adding fragrances or household mixtures will not correct an underlying plumbing problem.
Common Mistakes to Avoid When Cleaning Sink Drains
One common mistake is pouring grease or cooking oil into the kitchen sink. These substances may cool and cling to pipe surfaces, gradually contributing to blockages. Washing large amounts of food scraps down the drain can create similar problems. Collecting cooking grease and food waste separately helps prevent unnecessary buildup inside the plumbing system.
Another mistake is combining household cleaning chemicals in an attempt to produce a stronger solution. Mixing bleach with acidic cleaners, ammonia, or other products can release dangerous gases. Commercial drain cleaners may also react unpredictably with previously applied substances. Always follow product labels and avoid adding chemicals to drains when their existing contents are uncertain.
Using excessive force with mechanical tools can also damage household plumbing. Drain augers and plungers should be used carefully and only when appropriate for the situation. Ignoring recurring clogs or leaks may allow minor issues to become more expensive repairs. Safe cleaning methods and timely professional assistance are important parts of effective sink maintenance.
How Often Should You Clean Your Sink Drain?
The ideal cleaning frequency depends on how frequently the sink is used and what enters the drain. Kitchen sinks used for daily cooking may require more attention than bathroom sinks with limited use. Removing visible debris after use is a simple preventive habit. Regular inspections help identify buildup before it becomes a serious blockage.
Cleaning sink strainers and drain openings weekly is a practical starting point for many households. Bathroom sink stoppers can be inspected periodically for accumulated hair and soap residue. A more thorough cleaning may be useful every month or whenever drainage begins slowing. These intervals can be adjusted according to household habits and plumbing conditions.
Pay attention to early warning signs such as slow drainage, unusual odors, or water collecting around the drain opening. Addressing these issues promptly can reduce the likelihood of stubborn clogs. If problems return repeatedly despite proper cleaning, professional assessment may be appropriate. Consistent maintenance helps keep sink drains working efficiently over time.
Conclusion
Learning how to clean a sink drain is an important part of maintaining a hygienic and properly functioning home. Most minor buildup can be addressed by removing visible debris, washing drain components, and using suitable mechanical cleaning methods. Warm water and dish soap are useful for routine maintenance. Understanding the source of a blockage helps determine the most effective solution.
Kitchen and bathroom sinks require slightly different cleaning approaches because they collect different types of waste. Kitchen drains commonly accumulate food particles and grease, while bathroom drains collect hair and soap residue. Regular cleaning of strainers and stoppers helps reduce both problems. Avoiding harsh chemical combinations also makes routine maintenance safer for household members and plumbing components.
Preventing drain problems is generally easier than dealing with serious blockages. Dispose of grease and food waste properly, remove trapped hair regularly, and pay attention to changes in drainage speed. Seek professional assistance when clogs persist or plumbing leaks appear. With consistent cleaning habits, your sink drain can remain fresh, clear, and reliable.
Frequently Asked Questions
What is the best way to clean a sink drain?
Remove visible debris, clean the drain stopper, and wash accessible surfaces with warm soapy water. For minor clogs, a suitable sink plunger or mechanical drain tool may help restore proper drainage.
Can baking soda and vinegar unclog a sink drain?
Baking soda and vinegar create a fizzing reaction, but the mixture does not reliably remove stubborn blockages. Mechanical tools and proper debris removal are generally more effective for hair and compacted waste.
How do I get rid of a bad smell in my sink drain?
Clean the drain opening, remove trapped debris, and wash accessible components with dish soap and warm water. Persistent sewage odors may indicate a plumbing problem requiring professional inspection.
How often should I clean my sink drain?
Clean visible debris regularly and inspect sink strainers or stoppers about once a week. A more thorough monthly cleaning can help prevent buildup, although maintenance needs vary by household.
Why is my sink draining slowly even after cleaning?
Slow drainage may indicate a blockage deeper inside the plumbing, accumulated grease, or another drainage issue. If surface cleaning and basic methods fail, a qualified plumber can investigate the cause.